Thursday, December 29, 2011

Christmas pajamas


I made matching pajama pants for George and Titus this year, and let them unwrap their pants on Christmas Eve so they could wear them on Christmas morning. I made them with a gingerbread print flannel that I got at Joann's Fabric. For George's pants I used McCall's Pattern 4244. I am not very comfortable sewing with patterns, but this was pretty easy, and I think the pants turned out well, considering I wasn't able to have George try them on to check the fit. For Titus' pants I traced an existing pair of his pants and added some width at the waistline, and length at the top and bottom for the hem and casing. Here are my handsome boys with their new Christmas PJs!

Tuesday, December 27, 2011

Menu Plan...Tuesday?

I hope everyone had a wonderful Christmas! George and Titus and I had a little family celebration on Sunday, and spent the rest of the day with friends and family. However, my extended family loves celebrating Christmas, and we have to fit in celebrations with everyone, so Christmas is spilling over into this week as well! Yesterday we celebrated with my mom's family, and Friday we will be having "Christmas" with my dad's family. This is such a fun time of year. I love seeing all my family and sharing the joy of the incarnation with them : )

Here is our menu plan for the rest of the week. I only have to make dinner a couple nights, which is a nice break from the busyness of the past weekend.

Tuesday - Pepper steak and brown rice

Wednesday - Orange-rosemary chicken, Brussels sprouts, and butternut squash

Thursday - Shrimp fettucine and peas

Friday - Christmas with my dad's family

Friday, December 23, 2011

God sent His son


Now that I have my own sweet son, I am struck with the significance of God's sacrifice for us. Romans 8:32 says God "...did not spare his own Son, but gave him up for us all..." I can't think of any reason that I would sacrifice my own son, especially not for people that hated and rejected me.

Yet God did that very thing, because He loved us, and wanted us to be in a right relationship with Him. One line of a song I love says, "How deep the father's love for us. How vast beyond all measure. That He should give His only son. To make a wretch His treasure."


Christmas is all about the great love of a Holy God, who sacrificed His only son to give us life. Rejoice, because we have a savior, Jesus Christ!


"...I bring you good news of great joy that will be for all the people. Today in the town of David a savior has been born to you; he is Christ the LORD." - Luke 2:10-11


Thursday, December 22, 2011

Sticky buns


For as long as I can remember, Christmas breakfast has been a tradition on my dad's side of the family. We always had oyster stew (a weird tradition, no one was too disappointed to see it die out), egg casserole, and sticky buns. I remember my grandma getting up at 5 in the morning to make sticky buns (crazy!)

Last week, I woke up at about 4am and for some reason couldn't go back to sleep, so I decided to make breakfast. At first I was going to try making cinnamon rolls, but then I remembered our Christmas tradition of sticky buns and decided to try to find a recipe. I found one on Taste of Home's website that looked good, and set to work. They turned out as good as I remembered! I don't have the original recipe, but these sticky buns didn't disappoint ; ) Here is the recipe I used, with some minor alterations I made:


2 tsp yeast
1 1/4 cups milk
3 Tbsp butter
3 Tbsp sugar
1 tsp salt
3 - 3 1/2 cups flour

Filling:
1/3 cup butter, softened
1 Tbsp sugar
1 tsp cinnamon

Sauce:
1 cup brown sugar
1/2 cup butter
1/2 cup chopped pecans, optional (I didn't use these because neither George or I like nuts)

Heat the milk and 3 Tbsp butter until warm, but not hot (you should be able to comfortably hold your finger in it). Add the yeast, sugar, salt, and about half of the flour. Stir until combined, and add remaining flour until a soft dough is formed. Knead for about 6-8 minutes on a floured surface. Put in a greased bowl and cover with a tea towel. Let rise until doubled, about an hour.

Roll dough into a 16-10" rectangle.Spread with butter and sprinkle with the 1 Tbsp, sugar and 1 tsp. cinnamon. Roll up from a long side, pinch seams to seal, and cut into 12 equal slices.

Combine brown sugar and 1/2 cup butter in a small saucepan, and heat until butter is melted and sugar is dissolved. Add pecans if using. Pour into 2 pie plates or round cake pans and place the rolls, cut side down, on top of the brown sugar/butter mixture. Cover and let rise until doubled, about 1 hour.

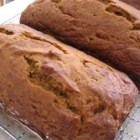
Bake at 375 degrees for 20-25 min, until golden brown. Invert the sticky buns onto plates, so the sauce is on top. They are delicious warm, but they taste good even when they are cooled : )

This post is linked to: The Ultimate Recipe Swap

Wednesday, December 21, 2011

Pinterest finds

I wanted to share a few things I found on Pinterest and tried. Some were successful, others didn't work out as well. I love the inspiration that I get from Pinterest, and all the wonderful ideas that are shared!

I thought these little owl ornaments were so cute! I made one and it turned out great! The only thing I changed was to use tiny black felt circles for the eyes instead of buttons, because I didn't have any black buttons that were the right size.


I find the most helpful kitchen hints on Pinterest! This worked really well, and was a lot easier than doing it with a fork ; ) By the time all the chicken was shredded it was very fine, so I don't think it would work well in soup or potpie, but I think it would be great in chicken salad or chicken quesadillas!


I tried to make these salt dough ornaments with Titus' hand print in them, but they didn't work very well for me. The salt dough was the right consistency, but Titus' hand was too big to really fit into an ornament-sized circle, and his little hand didn't leave a very deep impression. This tutorial may work really well for someone else, but I wasn't able to pull it off : /


I used this method the other day to make Teriyaki Salmon and it worked great! I left it in about a minute longer, and it came out slightly dry, so next time I will leave it in for no longer than 25 min. It was really nice to have this as a reference because I feel like I always either overcook or undercook salmon.


I love finding fun ideas on Pinterest! I hope this gives you some good ideas, and maybe even convinces you to check out Pinterest ; )

Tuesday, December 20, 2011

Christmas fabric gift tags

 I wanted to make some cute little tags for Christmas presents this year, so I decided to use some of my favorite Christmas fabrics! I don't have pictures of the process, sorry, but it is pretty self-explanatory. I made 3" circles in publisher, and wrote "To" and "From" in each circle in a curly font. I was able to fit 12 circles per page. Then I printed the circles out onto cardstock. I ironed a 8" x 11" piece of fusible web onto the back of each fabric that I used. After that, I ironed the now fusible fabric onto the back of the cardstock, so the circles were on one side, and the fabric was on the other side. I cut out each circle and zig-zag stitched around the perimeter of the circle. Then I punched holes in the top of the circles and threaded ribbon through them.

This is what the back of the tags looks like:


And here are the six different tags I made. I was able to make 12 of each different fabric.

I hope you enjoyed this little tutorial!

Monday, December 19, 2011

Menu Plan Monday - December 19

Christmas is almost here! We have a pretty low key week ahead, just getting last minute presents, etc. ready
; ) Here is what we are eating this week!

Monday - Teriyaki salmon, brown rice, and broccoli

Tuesday - Chicken rice soup & peasant bread

Wednesday - Scalloped potatoes and ham, peas

Thursday - Chili beans and rice

Friday - Slow cooked lamb chops and acorn squash slices

Friday, December 16, 2011

Breakfast burritos

There are many different renditions of breakfast burritos, made to suit individual tastes. This is the recipe I use when making breakfast burritos for my family. Since it is just me, George, and Titus, I make a whole recipe, wrap the burritos individually in foil and freeze them. Then I can easily pull out as many as I need and pop them in the oven or microwave for a quick breakfast!

~~~~~~~~~~~~~~~~~~~~~
 8 flour tortillas, (burrito size)
4 eggs, scrambled
1/2 lb. breakfast sausage, cooked and crumbled
2 potatoes, baked, peeled, and slice
1/2 cup salsa
1 cup shredded cheddar cheese

Lay out ingredients assembly line style, and top each tortilla with eggs, sausage, potatoes, salsa, and cheese.

Fold over the ends to enclose all the filling in the tortilla.


Then, either eat, or wrap in foil and freeze. When reheating I usually microwave a burrito for 2 minutes on high. You can also heat the burritos in a 350 degree oven for about 20 minutes, or until warm all the way through.


This recipe is linked to: The Grocery Cart Challenge Recipe Swap

Thursday, December 15, 2011

Baking up some holiday deliciousness!

My youngest cousins came over on Monday to help me make, cut out, and decorate Christmas cookies! It was so much fun, and I think they had a really good time too : )

The following recipe is the one we used for the cookies. We doubled it to make enough for our two families.

Sugar cookies:
3/4 cup butter (1 1/2 sticks), softened
1 cup sugar
2 eggs
1 tsp vanilla
2 1/2 cups flour
1 tsp baking powder

Cream butter and sugar, mix in eggs and vanilla. Combine flour and baking powder and add to wet ingredient, mixing until it is all incorporated. Chill for at least 1 hour.

Roll dough 1/8 - 1/4" thick. Cut out shapes with cookie cutters. Decorate with sprinkles, etc. if desired. Bake at 400 degrees for 5-7 minutes.

We decorated the cookies with sprinkles, colored sugar, coconut, crushed peppermints, toffee bits, M&Ms, and white chocolate chips, basically anything I had in the pantry. I definitely recommend decorating with crushed peppermints, it gives the cookies a subtle mint flavoring that is perfectly Christmassy!


Here is some photo documentation of our cookie masterpieces!


Wednesday, December 14, 2011

My funny little man

Titus is just hilarious! He makes me laugh all the time. I love that he is playing more independently and creatively now. He can communicate his needs pretty well with gestures and sign language, and has even started using some words like "all done", "yes", "no", "hi", and "bye-bye". Here are some pictures of what has has been up to lately.


 One pant leg rolled up...so awesome


 Silly boy wearing the tree skirt

Titus loves playing in his kitchen
 Here is the chef tasting his creation

Needs to be stirred a little more

 Opening the oven


 The cookies are ready!


 Composing a tune on the piano


Finally, a little known historical fact: There were actually dinosaurs present at Jesus' birth!
(just kidding, you can't believe everything you see on the internet you know)

Tuesday, December 13, 2011

Adding some Christmas cheer...


I love to decorate for Christmas, especially with things I have made myself. My crafts usually involve fabric, at least to some extent, because that is my crafting medium : ) This time I was inspired by this little wreath made by Amanda Soule.  The base is a Styrofoam wreath form I found at a church bazaar for 25 cents. I wrapped the wreath form in  1 1/2" strips of fabric and scraps of ribbon, and attached them with a hot glue gun. I added some felt leaves and buttons to finish it off. Amanda made a little bird to go in the center of her wreath, but I already had a cute felt bird ornament, so I just used that. I love it the finished project and think it adds just the right touch to our bathroom door!


This post is linked to: Making the World Cuter Monday

Monday, December 12, 2011

Menu Plan Monday - December 12

I love menu planning! It makes things so much simpler, and I spend less at the store than when I don't have a plan : ) Here is our menu for this week!

Monday - Enchiladas and salad

Tuesday - Turkey noodle soup and rolls (from freezer)

Wednesday - Jerk shrimp, coconut rice, and steamed broccoli

Thursday - Chicken with snow peas and linguine

Friday - Meatloaf, roasted potatoes, and green beans

Friday, December 9, 2011

Christmas gift tutorials - food!

I am wrapping up my Christmas gift tutorial series with the perfect gift, food. Holiday food is so much fun, and if you make it yourself it can be a lot less expensive than many other gifts. Food is also great because it is consumable, so it doesn't contribute to clutter ; ) To ensure gift giving success, know the tastes of the recipient, and any possible food allergies. Here are some ideas to get you started:


These little candies taste amazing! Yet they are made with the simplest of ingredients, and take very little time to make. These are a great gift for anyone who likes chocolate...or sugar : )


This makes a great little gift, especially packaged with some warm bread or muffins. It would be a nice teacher gift or neighbor gift. Cinnamon honey butter is easy to make and tastes fabulous!


This pumpkin bread recipe is great! My husband, who asked me not make any pumpkin bread, finished the whole loaf.  And pumpkin bread makes a great gift too, because it is so delicious, especially this time of year!


Peppermint bark is quintessential holiday treat. I think everyone should have a recipe for it. Store bought peppermint bark costs A LOT, and it doesn't taste nearly as good as the homemade stuff. For the best flavor use high quality dark and white chocolate. Don't use the "white chocolate" chips from the grocery store, they are just shortening and corn syrup. Spend a little more and get white chocolate made with real cocoa butter (Ghiradelli for example), it makes a huge difference.


This is the most amazing granola. It sounds a little strange to use olive oil in granola, but it gives the granola a spectacular flavor. This would be a great gift for someone who appreciates healthier foods, and wouldn't be as interested  in sweets.

Thursday, December 8, 2011

Christmas gift tutorials - coziness

This is the time of year to snuggle down with a warm blanket and a cup of tea, in front of the fireplace if you have one ; )  These gift tutorials are all things that promote warmth and relaxation, and are perfect for adding some coziness to your life.


Pillowcases are one of the easiest things to make! They are so practical and you can customize them to the tastes and interests of the recipient. All in all, a perfect gift : )


I made one of these for us, and I also made one for my nephew's first birthday. Bean bag chairs are truly awesome, everyone should have at least 1 : ) To simplify things, I just made the beanbag cover and bought an already-made bean bag to go inside. These sew up pretty quickly if you use a serger (assuming you don't break threads or needles, or have a one-year-old that un-threads the whole machine).


This spa wrap is a lot more convenient than trying to keep a towel wrapped around you, and I think the flowers on the front are adorable. You could do a lot of different things to decorate the front, I did a monogram for the one I made for my sister-in-law.

Wednesday, December 7, 2011

Christmas gift tutorials - baby

I have so many friends that are pregnant right now, or have just had babies. I guess I am just in that baby stage of life. These gifts would be good Christmas presents for friends and family who have just had a baby, or for baby shower gifts.


This hooded towel is wonderful because not only is it great for newborns, but it works well for older kids too, unlike most of the hooded towels on the market that are super tiny. I love making this as a baby shower gift, but I could see it working well for an older child too, maybe use a towel with a favorite character on it.


This bib is perfect for keeping those cute little outfits clean and drool free. I have about a million bibs and still they are always dirty! I like to back bibs with terry cloth, so they can double as a washcloth after meals, and they are more absorbent.


Some car seats come with strap covers, but our didn't, so I made strap covers for the car seat, and they have been very useful.. Even if the car seat already has strap covers that come with it, it can still be nice to have a spare pair in case you need to wash the covers.


Some strollers come with cup holders, mine did not, so I was very excited when I found this tutorial to make my own! Using laminated cotton for this tutorial works really well, but if you can't find it I'm sure regular home decor fabric would be fine too. Also, I used a strip of velcro to close it instead of snaps because I have never been too successful with snaps.

Tuesday, December 6, 2011

Christmas gift tutorials - kitchen

I spend a lot of time in the kitchen, so I always really appreciate gifts that make cooking or cleaning in the kitchen easier or more enjoyable. I know several other people who have appreciated these gifts as well. Here are a few of my favorite kitchen item tutorials:


This tutorial is very simple to follow. It is for a crocheted kitchen scrubbie, which may sound intimidating, but I can make it with no problem and I don't even crochet! This scrubbie is great for scrubbing gunk of off pots and pans, and you can just throw it in the wash if it gets gross. : )


Patchwork hot pad
This hot pad is surprisingly simple to make, even for a beginning quilter. Sew Mama Sew has some great tutorials, and this one definitely does not disappoint. You can make a set of hot pads that would be perfect for a housewarming or wedding present.


These grocery bag holders are great gifts to add a little beauty to your kitchen, and disguise those unsightly, but useful, plastic grocery bags. This is a good, basic tutorial to make one yourself.

Monday, December 5, 2011

Christmas gift tutorials - clothes

I didn't post anything over the weekend because it was crazy! I baked 12 dozen cookies for a cookie exchange, had lunch with relatives, dinner with a family from church, fellowship dinner with our young couples group, and bought and decorated our Christmas tree! But life has returned to normal and I am resuming my series on Christmas gift tutorials. Today's tutorials are for clothes, to make for yourself or others : )


This is the easiest, most comfortable skirt ever! I made one when I was pregnant, and it was a perfect, affordable maternity skirt. I used a jersey remnant from Joann's fabric, but you could probably use an old t-shirt. Also, I didn't make pockets on my skirt because I just wanted to keep things simple.


I made this dress as a gift and thought it turned out really cute. It was pretty simple too. If I had a girl I would make this dress several more times ; )


Freezer paper stencils are the coolest thing in creation! They are so basic. There can be a little bit of finicky cutting depending on your design, but other than that they are super easy. I made about 30 stencils for VBS t-shirts this year, and I think the kids really enjoyed making the shirts and were happy with them : )


These little footies are so easy! And they don't fall off baby's feet. I'm sure any moms of little ones can appreciate the importance of footwear that stays put. This is my go-to baby gift.


This is a great tutorial, with easy to follow instructions. I made this skirt for my cousin and (in my opinion) it turned out looking adorable! This skirt is for a little girl, but it gives instructions on how to draft the pattern for different sizes, so I think I might try making one of these for me : )

Friday, December 2, 2011

Christmas gift tutorials - organization

Most of the following projects are ones I have made for myself, because I can use all the organization I can get. I like to have things neat and organized, but I don't have the creativity to come up with these ingenious solutions ; )


I made one of these pockets to keep dry erase markers next to my magnetic dry erase shopping list on the refrigerator. It is a great organizational solution, and is super cute as well : )


I don't have a picture for this tutorial because it is copyrighted, so you'll just have to click on the link to see it. I made these baskets for me, and I made some for my mother-in-law.  I used pre-quilted fabric to save time, and they turned out to be pretty adorable!


Coupon Wallet
This coupon wallet is very simple to make, but is very helpful for keeping coupons organized. It wouldn't be very good for professional couponers that use 100s of coupons, but it is exactly what I needed to stay organized. I think it would also be a good way to organize receipts too!


I love Amanda Soule's work. Everything she does is beautiful. Again, no picture because of copyright, click on the link to see pictures. This gratitude wrap is a great way to keep everything together for card writing, and to make it all portable.

Thursday, December 1, 2011

Christmas gift tutorials - Bags

I love Christmas, it is definitely my favorite holiday! I love celebrating the miracle of our savior's birth, and the kindness of our God, who sent his only son to die in our place. I love the hustle and bustle of malls during the holidays. I love listening to Christmas music. I love decorating the house. And I love giving gifts.

I love giving homemade gifts that I poured time and love into, chosen to reflect the specific wants and desires of the recipient. Over the years I have made many homemade gifts, and I have come across some great tutorials. I want to share some of my favorite tutorials with my readers over this coming week, because it is always nice to have new ideas. All the tutorials I am going to link to are ones I have tried and been happy with. I will link to tutorials from a different category every day for the next seven days. Today, the tutorials I am linking to are all bags of some kind. I hope these links are helpful for you as you plan Christmas presents to make : )
 ~~~~~~~~~~~~~~~~~~~~~~~~~~~~~~~~~~~~~~~~~~~~~~~~~~~~~~~~~~~~~~~~~~~~~~~~~

This tote bag is awesome because it opens out into a picnic blanket! I think this would be great for a college student. When I was in college, my friends and I would always sit outside on blankets and study when the weather was nice. This would have been perfect for that!


Another great college student gift. This bag is nice and big, so it can hold a month's worth of laundry ; ) This might also be good for someone who travels a lot. Or to take to camp. The possibilies are endless!


This clutch is so cute! And the tutorial is very well written. I have made a couple of these, and they have all turned out great! And little bags like this are the perfect generic girl gift, because everyone can use little zippy bags to keep things in.


This is the BEST tote bag ever. No lie. I have made too many of these to count. Random people in the store want to buy them from me. They are perfect grocery bags, beach bags, anything you need bags. Can you tell I really love this bag?


Diaper Bag Tutorial
This is a great diaper bag. I made one for myself, and one for a friend. It is a little time consuming, but worth the effort : ) This would be a good gift for a friend that is expecting a baby, if you know she doesn't already have a diaper bag picked out.